


 The Wouxun KG-UV8D two way radio has a quick and easy reset. The only downside to the reset operation is it also clears out all the language settings and sets them to the default. English is its second language. The default is Chinese. The reset process clears all the language settings, both voice prompts and menu items shown on the display. If you speak and read Chinese, that's not an issue. If English is your first or only language, fear not, we're here to help. if you can read this, follow the instructions below and post-reset navigation should not be a challenge.
There are two reset options.
Functional Parameter Reset (VFO)
the VFO option resets the function settings to factory defaults without wiping out the channel settings.
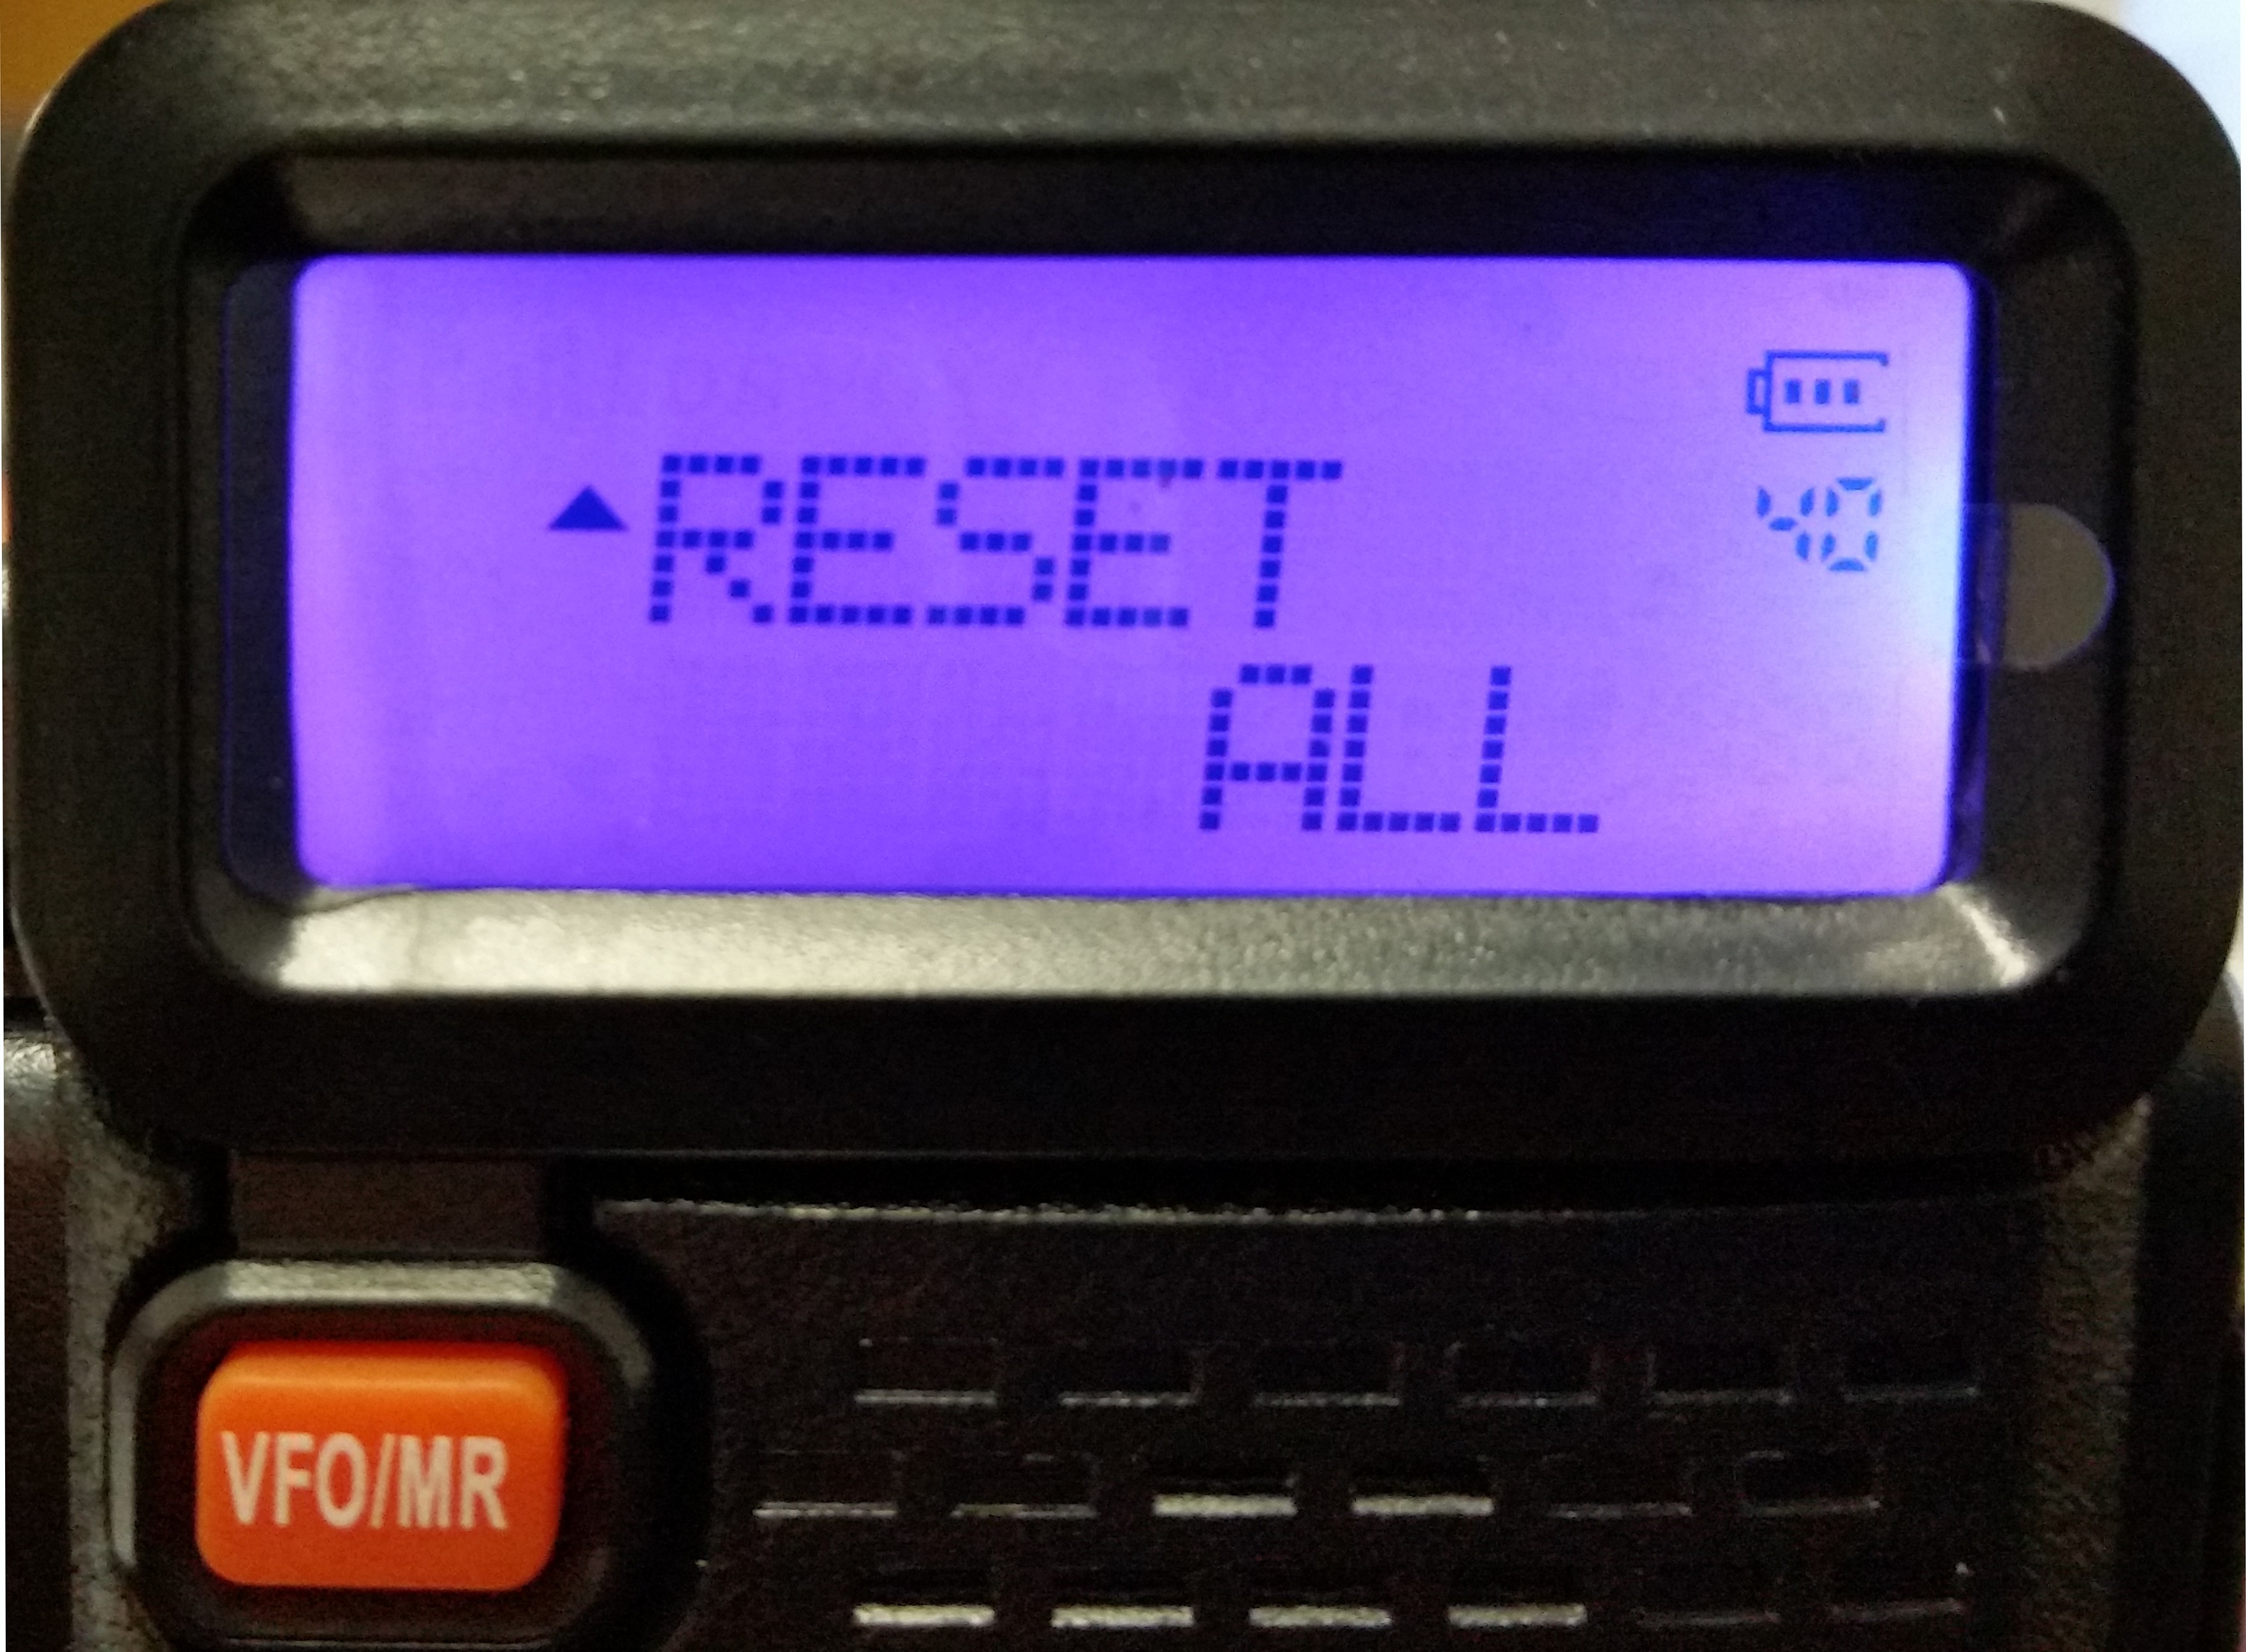
Total Parameter Reset (ALL)
The ALL option performs a full reset back to factory defaults and clears the channel settings.
Follow the steps below to reset a Wouxun KG-UV8D, KG-UV8D Plus, or KG-UV8E two way radio from Buy Two Way Radios to its original factory settings and English prompts.
To perform a VFO Reset
1. Turn on the radio and press the MENU button.
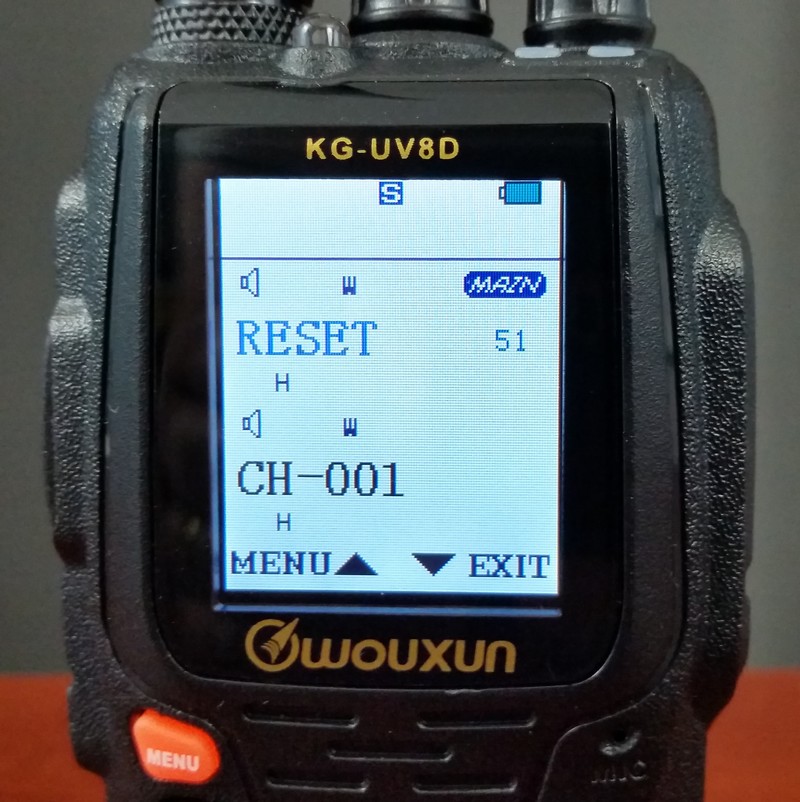
2. Press the UP and DOWN arrow key to select RESET (Menu Item 51).
3. Press MENU to choose RESET.
4. Press the UP/DOWN arrow keys to choose VFO.
5. Press MENU. The radio will display RESET SURE?
6. Press MENU to confirm. The radio will display Waite please (yes, "wait" with an "e") for a few seconds, then shut down and restart.
7. The radio will revert to Chinese language mode. Reset is complete.
To perform a FULL Reset
1. Turn on the radio and press the MENU button.
2. Press the UP and DOWN arrow key to select RESET (Menu Item 51).
3. Press MENU to choose RESET.
4. Press the DOWN arrow key to choose ALL.
5. Press MENU. The radio will display RESET SURE?
6. Press MENU to confirm. The radio will display Waite please for a few seconds, then shut down and restart.
7. The radio will revert to Chinese language mode. Reset is complete.
To set language from Chinese to English
1. Press MENU.
2. Press the UP and DOWN arrow key to select LANGUAGE (Menu Item 12). Note: the menu will be in Chinese, so the next two steps are important if you cannot read Chinese characters.
3. Press MENU.
4. Press the DOWN arrow key once.
5. Press MENU.
6. Press EXIT.
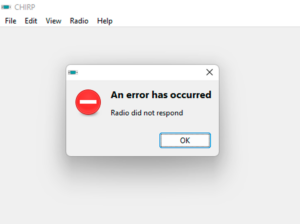
A reset may resolve many issues or malfunctions, but may not work for every scenario. However, it is usually a recommended first step when troubleshooting a two way radio.