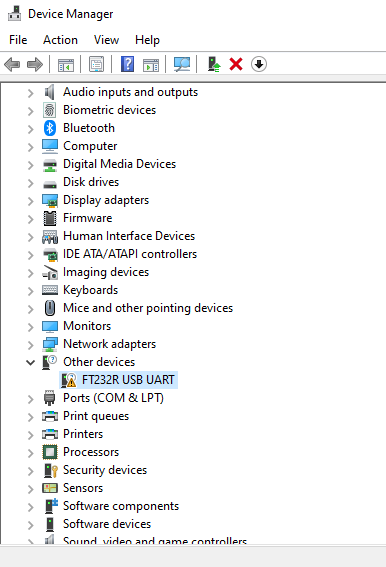
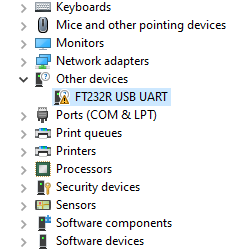
Something has changed with a recent update of Windows 10 that may affect the installation or operation of radio programming cables equipped the FTDI chip, such as the XLT Painless Programming Cable. Previously, all you needed to do was plug the cable into an available USB port and Windows would automatically detect it and install the driver, making the cable instantly recognizable and available for use.
All of that changed with a recent Windows 10 update. When installing the USB programming cable, Windows 10 does not correctly recognize the cable or is unable to locate the driver for it. When checking the device manager, the USB port may look something like what is in the image below: We have contacted FTDI support to learn more about the issue and find out when it may be corrected for future Windows updates. FTDI acknowledged the issue and assured us that their developers are currently working to resolve it. FTDI estimates that a fix with the Windows 10 automatic downloads should be available "within the next couple of weeks".
However, there is a fix for the interim. FTDI provided an executable installer that can be run manually to install the cable driver. Here are the steps for installation:
- Download CDM21236_Setup.zip
- Unzip and run the executable setup file
- Connect the cable to the PC
Conversely, you can install the driver manually via the Update Driver tab in device manager properties using the driver-only package. To perform this type of installation, follow the steps below:
- Download CDM+v2.12.36.1+WHQL+Certified.zip (this is the driver-only package)
- Unzip the file
- Plug the cable into the PC
- When Windows asks to search for a driver, choose the option Browse my computer for driver software.
- Navigate to the unzipped folder
- Check the box for include subfolders and click Next
- When the installation is complete, note the COM port assigned to the device and click Close
And that's it. The cable should now be recognized by Windows and properly installed.


