
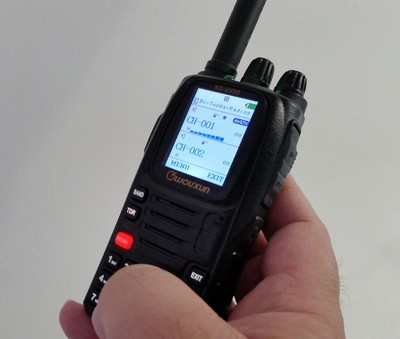
 The Wouxun KG-UV9D is a multi-band portable handheld two way radio with Wouxun's iconic color LCD display, full DTMF keypad, and a lot of nice features, all at a great price. Such a powerful transceiver requires a bit of programming to utilize its options, and for the first time user, it can be intimidating. Looks can be deceiving, because it isn't as difficult as it seems. It's not that difficult at all, once you know how it's done.
The easiest way to Program the KG-UV9D is with a computer. When connected to an XLT Painless Programming Cable, the process is even easier, since the programming cable itself is so quick and easy to install. At present the only programming software for the UV9D is provided by Wouxun, however it is readily available from the manufacturer or from us if the radio was purchased from Buy Two Way Radios. The KG-UV9D is not yet supported by CHIRP, the popular open source programming software used to program a variety of other radios, such as the Wouxun KG-UV8D and Baofeng UV-5R.
Programming the KG-UV9D manually from the radio itself is much like programming other Wouxun radios, such as the KG-UV8D and its variants, the KG-UVD8 Plus and the tri-band KG-UV8E. In fact, the steps are almost exactly the same, with two exceptions. First, the A/B button was replaced with a TDR button, which is held down for two seconds to toggle between VFO and Channel modes. Second, the menu item numbers are different. For instance, on a KG-UV8D, 8D Plus or 8E, the menu option to assign a frequency to a channel (MEM-CH) is 28; on the KG-UV9D and 9D Plus, it is number 30.
Other than the TDR button and the numbering of the menu options, everything else is the same. If you know how to program the KG-UV8D, you have already mastered the KG-UV9D. If you haven't programmed a Wouxun radio before, follow the instructions below to program your Wouxun KG-UV9D or KG-UV9D Plus Limited Edition directly from the keypad of the radio and you will soon become the master of all these models.
How to manually program a simplex channel into the KG-UV9D
- Step 1. Press [BAND] and choose the A Side (upper display) as MAIN.
- Step 2. Press and hold [TDR] for two seconds and enter Frequency Mode.
The radio should be in Frequency (VFO) Mode to program all settings to the channel. - Step 3. Enter the frequency.
Use the keypad to enter the frequency into the radio. - Step 4. optional - Enter the transmit CTCSS/DCS code.
- CTCSS - [MENU] 16 [MENU] [enter/choose code XXXX] [MENU] [EXIT]
- DCS - [MENU] 18 [MENU] [choose code XXXXX] [MENU] [EXIT]
Use the [Arrow Up/Down] keys or the channel selector knob to choose the codes from the menu.
- Step 5. Assign the frequency to a channel.
[MENU] 30 [MENU] [enter channel number XXX] [MENU] [EXIT]
If the Channel number is displayed in blue, it is already assigned. Choose another channel.
If the channel number is red, the channel is available.
How to manually program a repeater channel into the KG-UV9D
- Step 1. Press [A/B] and choose the A Side (upper display) as MAIN.
- Step 2. Press and hold [TDR] for two seconds and enter Frequency Mode.
Like the simplex channels, the radio should be in Frequency (VFO) Mode to program all settings to the channel. - Step 3. Enter the frequency.
Use the keypad to enter the frequency into the radio. - Step 4. optional - Enter the transmit CTCSS/DCS code.
- CTCSS - [MENU] 16 [MENU] [enter/choose code XXXX] [MENU] [EXIT]
- DCS - [MENU] 18 [MENU] [choose code XXXXX] [MENU] [EXIT]
Use the [Arrow Up/Down] keys or the channel selector knob to choose the codes from the menu.
- Step 5. Input the repeater frequency offset.
Press [MENU] 28 [MENU] [enter the offset for 2 meter or 70 cm repeater] [MENU] [EXIT] - Step 6. Enter the Transmit Frequency Shift.
Press [MENU] 6 [MENU] [enter 1 for positive shift or 2 for negative shift] [MENU][EXIT]
Note: There are three ways to enter the frequency shift.- Enter 1 for positive (+) and 2 for negative (-).
- Press [Arrow Up/Down] to toggle + or -.
- Turn the channel selector knob to choose + or -.
- Step 7. Assign the frequency to a channel.
Press [MENU] 30 [MENU] [enter the channel number XXX] [MENU] [EXIT]
If the Channel number is displayed in blue, it is already assigned. Choose another channel.
If the channel number is red, the channel is available.
To add more channels, repeat the steps above. If these instructions are followed correctly step-by-step, you should be able to program all 999 memory channels in your Wouxun KG-UV9D. Note: These instructions will also work for KG-UV9D Plus.


Try downloading the usb driver. This assigns rge radio to com e
Hi, i've got the KG-UV9D and i'm trying to connect it to a motorola T80.
The frequnecy of the motorola starts at 446.00625 mhz to 446.09375 mhz.
I've already insert the frequency on the KG-UV9D, and it receives the signal from the T80, but when i press the button on the KG-UV9D to talk it gives the message "FREQ OVER". Can you help me please?
Hi Ed, we need more information. Does the PC detect the programming cable? Is it listed in the Device Manager? Is there a COM port number assigned to it? If so, what is the number?
I have not been able to program the radio with the software. The port is the problem. My PC is a win 8.1 Tried several times. Help please. I have the UV9