(888) 569-9499CONTACT US
0Item(s)

You have no items in your shopping cart.

Product was successfully added to your shopping cart.

Articles

  • Two Way Radio Antenna Connector Types

    Many handheld portable business two way radios have an antenna that is removable for replacement or an upgrade as needed. Damaged antennas can be easily replaced by the user at low cost. Swapping a large stock antenna for a shorter, stubby one can make the radio easier to handle. Adding a longer whip antenna may significantly increase range. In any event, there are several advantages for owning a business radio with a removable antenna and a few good reasons why you may want or need to do it.

    Removable antennas are not universally compatible with all makes and models of radios - even those that use the same bands and frequencies to which the antennas are tuned. Whether or not an antenna can be physically attached to a particular radio will depend on the type of connector it has.

    Manufacturers use several different types of connectors to attach the antennas to the transceivers, and may even use different connectors across different model series. A few, such as connectors found on some Motorola and Vertex Standard business radios, are even proprietary to their brands.

    No doubt, shopping for an antenna with a connector that is compatible with your radio can be confusing. Fortunately, Buy Two Way Radios can help. Our chart of Two Way Radio Antenna Connector Types listed below will tell you what these connectors are and how to identify them. To find the right connector for your specific radio, use our Two Way Radio Antenna Connector Chart which lists dozens of popular business radios and the types of connectors they use.

    This chart identifies common two way radio antenna connectors. It lists the name of each type of antenna connector with a photo of the connector from the antenna and the radio. Click on the photo for a larger image.

    Handheld Portable Radios
    Connector (Antenna) Connector (Radio)
    SMA Male Antenna Connector (Standard)
    SMA Male (Standard)
    SMA Female Radio Connector (Standard)
    SMA Female (Standard)
    SMA Female Antenna Connector (Standard)
    SMA Female (Standard)
    SMA Male Radio Connector (Standard)
    SMA Male (Standard)
    SMA Male Antenna Connector (Motorola/Vertex)
    SMA Male (Motorola/Vertex Standard)
    SMA Female Radio Connector (Motorola/Vertex)
    SMA Female (Motorola/Vertex Standard)
    SMA Female Antenna Connector (Motorola/Vertex)
    SMA Female (Motorola/Vertex Standard)
    SMA Male Radio Connector (Motorola/Vertex)
    SMA Male (Motorola/Vertex Standard)
    J Male Antenna Connector
    J Male
    J Female Radio Connector
    J Female
    Base/Mobile Radios
    Connector (Antenna) Connector (Radio)
    UHF Male Antenna Connector (PL-259)
    UHF Male (PL-259)
    UHF Female Radio Connector (SO-239)
    UHF Female (SO-239)
    Mini UHF Male Antenna Connector
    Mini UHF Male
    Mini UHF Female Radio Connector
    Mini UHF Female
    N Male Antenna Connector
    N Male
    N Radio Connector
    N Female
  • Motorola RM Series business radios offer NOAA weather channel and alerts

    RMU2080d-2.jpgWhen it comes to business two way radios, function, range and durability often trump bells and whistles. As a general rule, unless you are going the digital route, the feature sets on typical analog radios made for business and commercial applications are fairly standard and there isn't a whole lot of real innovation going on. Sure, the added features are nice to have, but for general use, a good business radio needs to do two basic things, and do them well. They need to be able to transmit and receive reliably and on demand.

    Considering the limited need for flashy features in most industrial communications, one would think the manufacturers have run out of ideas for new walkie talkie makeovers. Well, hold the phone. Motorola recently found a way to add one more feature to their new RM Series business radios that, while not exactly innovative, is somewhat new and different for the Motorola business radio market. It is a practical feature that makes obvious sense.

    All Motorola RM Series radios that have a channel selector knob support NOAA weather channels and weather alerts.

    The addition of a weather channel on a business radio is not a bad idea at all, especially when such a radio is used in an industry that primarily operates outdoors. Construction workers, maintenance crews, surveyors and others who work in outdoor and open environments can directly benefit from up-to-date announcements and warnings of ever-changing weather conditions, forecasts and other hazards while working in the field, potentially even saving lives in cases of severe weather emergencies. Access to an instant weather channel is a great feature to have on any radio. A weather alert feature is even better, and its a wonder more radios don't already have one.

    These features are currently available on three models in the Motorola RM Series, the RMU2080, RMU2080d and the RMV2080. The NOAA Weather Radio feature is pre-programmed on channel 8 on all three models. According to Motorola, the feature can also be configured through the Customer Programming Software or in Advanced Configuration Mode to operate on any of the other channel positions available on these radios. Up to 7 national NOAA weather frequencies are available and the channel can be customized with NOAA weather frequencies specific to the user's geographic location. When the NOAA weather channel is selected by the user, the radio gives a voice announcement with the channel and weather frequency number. Pressing SB2 on the radio will change the weather frequency while in the Weather Channel.

    The radio can also monitor a particular weather frequency for National Weather Service Alerts. When enabled, the weather alert feature can "mute" the weather radio, allowing the user to change to a regular business radio frequency for normal communication while it listens for a warning alarm tone issued by the National Weather Service. If the warning alarm is activated, the radio will go to the NOAA weather frequency so the weather announcement can be heard.

    The addition of NOAA weather channels with alerts has become standard on Motorola consumer walkie talkies, but is a new concept for their 2 watt business radios. This functionality was not available on the Motorola RDX series and its addition as a standard on the RM Series takes Motorola business radios to another level. Is this the beginning of a trend for other two way radio manufacturers such as Icom, Kenwood, Olympia and Vertex Standard? Only time will tell. We'll just have to wait and see. Such a feature does offer real added value and, on any radio, it just makes good sense.

  • Cobra Two Way Radio Battery Compatibility Chart

    One important consideration when choosing a portable handheld two way radio is power. Since batteries are usually the primary sources of power for handheld radios, the type of power cells needed is a key question. There are many makes and models of radios to choose from and there are a many different types and sizes of batteries available on the market, some of which are only compatible with specific radios, so the answer can be quite confusing.

    In the case of Cobra FRS/GMRS two way radios, the battery options are specific, yet they vary significantly between different models within the product line, even between models that use the same type of battery. To simplify things, we've created a chart that compares all current Cobra consumer walkie talkies with the types, sizes and the number of batteries each radio requires.

    Model Battery Type Size Quantity
    CX112 Alkaline AAA 3
    CX210 Alkaline AAA 4
    CX312 Alkaline/Rechargeable AA 3
    CXT135 Alkaline/Rechargeable AAA 3
    CXT145 Alkaline/Rechargeable AAA 3
    CXT235 Alkaline/Rechargeable AAA 4
    CXT345 Alkaline/Rechargeable AA 3
    CXT390 Alkaline/Rechargeable AA 3
    CXT425 Alkaline/Rechargeable AAA 4
    CXT545 Alkaline/Rechargeable AA 3
    CXR725 Lithium-Ion CXR725 Battery Pack 1
    CXR825 Lithium-Ion CXR825 Battery Pack 1
    CXR925 Lithium-Ion CXR925 Battery Pack 1
  • Tech Support for Baofeng Two Way Radios

    We receive a lot of support requests regarding the installation, operation and troubleshooting of Baofeng products, most notably the Baofeng programming cable and software. Interestingly, many of these queries come from folks who didn't buy the products from us. They may purchase their amateur radios and accessories new or used from an auction site, other online retailer or a company based in China, then contact us for support. Some find us by searching for support resources on the web, some mistake us for the manufacturer, but a surprising number of folks are sent to us by the very entities who sold them the Baofeng radios and accessories - our competitors!

    Programming the Baofeng UV-5R can be accomplished easily with the Baofeng programming cable and CHIRP software. However, if the correct programming cable and driver are not used, it can become an issue. Unfortunately, counterfeit radios and cables exist and it is not uncommon to receive a clone or counterfeit product from an unauthorized reseller. This is why it is important to verify the validity and source of the equipment before you purchase it.

    As an authorized Baofeng dealer, Buy Two Way Radios provides genuine Baofeng radios and accessories, such as the Baofeng UV-5R Dual Band Amateur Radio and the Baofeng UV-5R Series USB Programming Cable. The programming cable we offer comes with an original disc we created in-house that contains an improved working driver that is tested to work with Microsoft Windows XP, Windows Vista, Windows 7 and Windows 8. The CD also includes the latest stable version of CHIRP, the open source programming software which is tested by licensed amateur radio operators to work with the UV-5R and other Baofeng amateur two way radios.

    If you did not purchase your Baofeng radios from Buy Two Way Radios, please understand that we are a Baofeng dealer and are not the manufacturer. Although we do sell Baofeng products and the licensed amateur operators on our staff do test and use them, we do not design or make the radios ourselves, so there are some limitations to the scope of our support, especially if the products were not purchased from us. While we are unable to support products purchased from our direct competitors and other retailers, we do support the products purchased from us. In addition, we offer resources that are available to the general public. A few of them are listed below.

    From our blog:
    A Real Baofeng UV-5R Owners Manual
    How to install the Baofeng USB cable driver and software

    From our podcast:
    The Two Way Radio Show TWRS-54 - An Introduction To Amateur Radio (This episode features a review of the Baofeng UV-5R)
    TWRS-67 - The 2013 Rock Hill Hamfest (This episode features a review of the Baofeng BF-F9)

    From our videos:
    Baofeng UV-5R Amateur Radio Unboxing
    How to connect the Baofeng UV-5R amateur radio to the Tram 1185 mobile antenna
    How to check the firmware version of the Baofeng UV-5R

    You can also request assistance in our Two Way Radio Forum, a support community of two way radio experts and enthusiasts. The forum is online 24/7 and is monitored by our staff at Buy Two Way Radios.

    More information about CHIRP is available at http://chirp.danplanet.com/projects/chirp/wiki/Home and complete instructions for programming the Baofeng UV-5R are available at http://www.miklor.com.

  • How to install the Baofeng USB programming cable and software

    Baofeng UV-5R.jpgBaofeng handheld two way radios are well known among amateur radio operators everywhere. Models such as the UV-3R, UV-B6, BF-F9 and the legendary UV-5R are a common staple in the modern ham shack, and with good reason. These radios are compact, easy to use, versatile and, best of all, extremely inexpensive. They are some of the most affordable amateur radios on the market. These attributes have made Baofeng a household name in the ham community.

    However, programming a Baofeng radio from a computer isn't all that intuitive and can become messy even for the most experienced ham who is not used to Chinese-made radios. The USB cable driver offered by Baofeng is buggy and the programming software made by the manufacturer is, for all intents and purposes, junk.

    Fortunately, there are other options available, and once properly installed, they are actually quite good. You just need to know where to find these options and how to install them properly. Once that is accomplished, programming is usually a breeze.

    To find and install the Baofeng USB Programming Cable driver and programming software correctly, follow the instructions below. NOTE: follow these instructions completely and in order. Failure to do so may only bring more frustration when things don't work.

    1. To start, the computer should be on and the radio should be off.

    2. Locate the correct USB programming driver for your operating system. You can download the Prolific driver for Windows, Mac and Linux at http://www.miklor.com/COM/UV_Drivers.php. If you purchased the Baofeng UV Series USB Programming Cable from Buy Two Way Radios, the driver for Windows will be on the CD included with the cable in the USB Cable Driver folder. Insert the CD and go to USB Cable Driver > USB Cable Driver Prolific 3.2.0.0.exe. This is the correct driver.

    3. Install the USB programming cable driver. Do NOT connect the USB cable at this time.

    4. Locate the CHIRP Programming Software for your operating system. The latest stable build for Windows XP, 7, 8, MAC and Linux can be downloaded from http://chirp.danplanet.com/projects/chirp/wiki/Download. It is also included on the Buy Two Way Radios CD in the CHIRP Programming Software folder. Choose the appropriate folder for your operating system. Install the program but do not run it yet.

    5. Plug the USB programming cable into the USB port on your computer. Plug the other end of the cable into your radio and turn it on.

    * Additional steps for Windows *
    - There may or may not be a notification after connection. To verify the connection, check the Windows Device Manager. Access to the Device Manager will depend on your version of Windows. Once in Device Manager, click on Ports (COM and LPT). It should be listed as Prolific USB-to-Serial Comm Port (COMX). X denotes the COM port number. Note the number and write it down if necessary, as you will need to know it when configuring the programming software.

    - If there is a yellow triangle with an exclamation mark next to the USB device, Windows did not install the driver correctly. To correct the issue, right-click on the device and choose Update Driver Software on the pop-up menu. Choose Browse My Computer to install the driver manually. Choose Let me pick from a list of device drivers on my computer. Choose Prolific USB-to-Serial Comm Port Version: 3.2.0.0 and click NEXT. The correct driver should install and the yellow notification should disappear from the Device Manager. Note the COM Port number.

    6. Run the CHIRP Programming Software. Click Go to Radio on the menu bar and choose Download From Radio. Choose the COM Port number for the USB cable, the Vendor (Baofeng) and the model of the radio (such as UV-5R) from the drop down lists in the pop-up box. Your radio should be connected to the computer and CHIRP should now be able to communicate with it.

    * Additional Instructions for Windows laptops *
    On some laptops, the device manager may indicate the cable is installed correctly, but CHIRP may not detect the COM Port. This may occur if Windows Power Management is enabled on the device. To activate the cable, go to the Device Manager and right click on Prolific USB-to-Serial Comm Port (COMX). X denotes the COM port number. Click Properties on the pop-up menu. Click the Power Management tab. Remove the check from the box next to Allow the computer to turn off this device to save power and click Apply or Save.

    To verify the connection, Run the CHIRP Programming Software. Click Go to Radio on the menu bar and choose Download From Radio. Choose the COM Port number for the USB cable, the Vendor (Baofeng) and the model of the radio (such as the UV-5R) from the drop down lists in the pop-up box. The program should download the frequencies from the radio. When it completes the data transfer, the frequency table will appear on the screen. The radio is now ready to program through your computer.

    As an authorized Baofeng Dealer, we want installation to be as easy and painless as possible so you can enjoy your radios for many years to come. If these instructions are followed correctly, you should not have any difficulty connecting the Baofeng radio to your computer. After the initial setup, future connection to the computer should be a matter of simply plugging the USB programming cable into your radio and computer and running CHIRP.

    RPC-K1-UF-1.jpgNote: If you followed the installation instructions and are still having trouble, there is now another solution available. The XLT Painless Programming Cable installs quickly and easily on computers with Windows XP, Windows 7 and Windows 8. Installation is automatic on many systems with little or no user interaction required. The XLT Painless Programming Cable works with Baofeng, Kenwood, Wouxun and other two way radios equipped with standard two pin Kenwood connectors.

    Update: Hear our review of the Baofeng UV-5R Programming Cable in Episode #82 of The Two Way Radio Show Podcast!

  • The advantages of earloops

    EL-100-earloop.jpgFor discreet communications using two way radios, a surveillance earpiece is the way to go. With its small, footprint, light weight and transparent tubing, a surveillance earpiece with a traditional mushroom tip can be worn stealthily inside the ear, drawing little to no attention to the casual observer. It's a popular accessory for security professionals, hunters or anyone else who needs an earpiece that is easy to hear and is very discreet.

    For the most part, a surveillance earpiece is a great choice for stealth or low profile applications. However, there are a few drawbacks. The mushroom tip sits down inside the ear canal, blocking the ability to hear ambient sound. Once the mushroom tip has been used in the ear, for hygenic reasons it should be replaced before the earpiece is worn by another user. In addition, some users complain that the mushroom tip can start to be uncomfortable when worn for a long period of time.

    Fortunately, there is an alternative to the mushroom tip. It's called an earloop. Like the mushroom tip, the earloop fits inside the ear and is somewhat inconspicuous. It is also removable and replaceable to maintain hygenics. The difference is comfort and audio. Earloops will provide a more comfortable fit, while at the same time offering better sound quality. The earloop is designed to give you the fit of an earpiece similar to what a musician or newscaster would wear.

    Earloops come in 3 different sizes; small, medium and large and are packaged in pairs, providing one earloop for the left and one for the right ear. They are formed to fit inside the outer ear, so it is important to choose the correct size for the best fit.

    If you need a surveillance earpiece for your radio but find the mushroom tip awkward or uncomfortable during extended wear, give earloops a try. It's an easy and inexpensive alternative to swapping out an entire earpiece and may just be the way to go.

    For instructions on how to wear earloops, watch this Radio 101 video tutorial.

  • The Amateur Radio Phonetic Alphabet

    Amateur radio operators are required to identify themselves over the air by their alphanumeric call signs, so its no wonder that many hams may know one another only by the sign instead of an actual name or handle. However, identifying the call signs correctly can be a challenge, especially when the letters in a sign sound similar to one another. For instance, the letter "M" sounds similar to the letter "N", "B" may sound like "D", and so forth. This can be particularly troublesome if the transmission is weak or encounters a lot of interference.

    To avoid confusion and clarify communications, amateurs use the phonetic alphabet. It was not a unique concept, as phonetic alphabets were already in use by the British military during World War 1, but it was not worldwide standard. The first known international alphabet was established by the International Telecommunications Union (ITU) in 1926. The ITU made various changes to the alphabet during the next twenty years until a version was adopted by the International Civil Aviation Organization (ICAO) in 1956 and finalized by the ICU. The phonetic alphabet in use today is now a universally recognized standard.

    Here is the internationally recognized ITU amateur (ham) radio phonetic alphabet:

    Letter Phonetic Word Pronunciation
    A Alpha al-fah
    B Bravo brah-voh
    C Charlie char-lee
    D Delta dell-tah
    E Echo eck-oh
    F Foxtrot foks-trot
    G Golf golf
    H Hotel hoh-tell
    I India in-dee-ah
    J Juliet jew-lee-ett
    K Kilo kee-loh
    L Lima lee-mah
    M Mike mike
    N November noh-vem-ber
    O Oscar oss-cah
    P Papa pah-pah
    Q Quebec keh-beck
    R Romeo row-me-oh
    S Sierra see-air-ah
    T Tango tang-go
    U Uniform you-nee-form or oo-nee-form
    V Victor vik-tah
    W Whiskey wiss-key
    X Xray ecks-ray
    Y Yankee yang-key
    Z Zulu zoo-loo

    Chart courtesy of Buy Two Way Radios.

  • How to match a CLS1110 or CLS1410 to a Motorola VL50 radio

    We occasionally speak to customers who have Motorola VL50 radios and want to purchase a CLS1110 or CLS1410 to add to their fleet. Both VL50 and CLS radios look identical to each other, but are they?

    The VL50 is the same radio as the CLS series models, but has 8 channels and different built-in frequencies. It is part of a line of Motorola business radios that are intended to be sold by local (non-internet) dealers, and are usually priced much higher than the CLS series even though there is almost no difference.

    An out of the box VL50 will not talk to an out of the box CLS1110 or CLS1410 like you would expect. They can communicate, but the channels are all mixed up! The following chart shows the CLS channel and the equivalent channel on the VL50. (Note, the CLS1110 has 1 channel and the CLS1410 has 4).

    CLS VL50
    1 2
    2 8
    3 5
    4 6

    If you don't want to deal with the hassle of channels not matching up (and who would!), you can go into programming mode on the radios and assign each channel to a different frequency. Both the CLS series and the VL50 have 56 built-in frequencies, but unfortunately the frequencies are not the same. They do, however, match up on frequencies 1-8, so just make sure you assign your channels on both radios to one of the first 8 frequencies and you're set.

    Here's a brief summary of how to program your Motorola CLS series or Motorola VL50 radio.

    How To Enter Programming Mode
    Press and hold the large Push to Talk (PTT) and MON buttons simultaneously for 3 seconds while you turn the radio on. The radio will beep and display the letters PROG. The channel number will flash and the letters FREQ (frequency) and CODE will alternately flash on the display.

    (If you press and release the Push to Talk button while programming the CLS1410, it will take you to the top of Programming Mode.)

    How To Select a Frequency for a Channel
    1. (CLS1410 only) In programming mode, press the MENU button until the channel number flashes and the frequency and code are alternately displayed. This will be the first setting in programming mode.

    2. Press the plus or minus button to choose the channel. Note that the first two steps do not apply to the CLS110 since it has only one channel.

    3. (CLS1110 and CLS1410) Press the MENU button until the word FREQ (frequency) appears and the frequency number flashes on the display.

    4. Press the plus or minus buttons choose the frequency you want.

    5. Press and hold the large Push to Talk (PTT) button to exit programming mode or press the MENU button to program other features of the radio.

    That's all there is to it. Once the channels are set to the same frequencies, your VL50 and CLS two way radios should be able to communicate with each other.

  • Kenwood Protalk Two Way Radios and Narrowbanding

    With the deadline for the FCC's 2013 narrowband compliance requirements having recently passed, it seems that we are getting more questions than ever about this subject! Kenwood Protalk radios seem to be of particular interest, so we thought it might be helpful to detail which models are compliant and how to bring your radios into compliance.

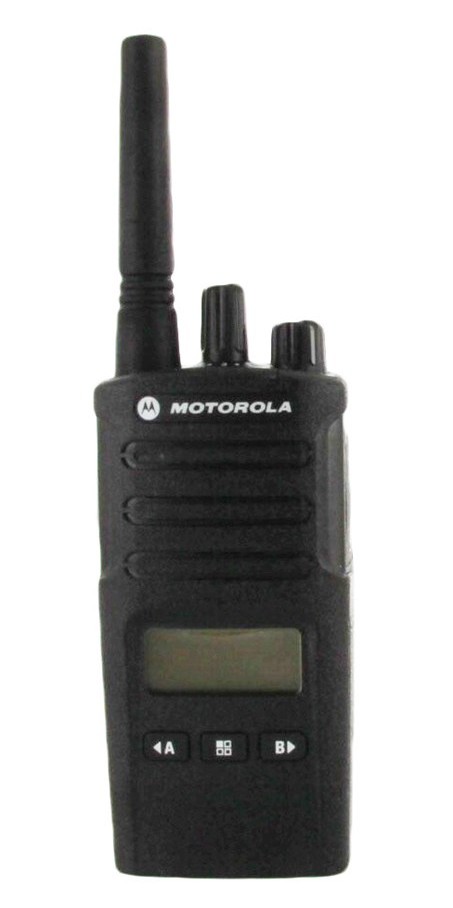
    TK2300/TK3300 Series Radios
    If you didn't require any special programming and you are using one of the frequencies "right out of the box" then this information applies to you. If your radio was programmed to special frequencies, then this will likely not apply.

    Kenwood made a change to the default programming on the models in this series in the summer of 2012. All radios in this series purchased after August 1, 2012 are preset to 100% narrowband frequencies. If your radio was purchased prior to August 1, then you likely have some channels that are not in narrowband mode. For these models, refer to the list below for the channels that are narrowband compliant.

    TK-2300 - Channels 5, 15, and 16 are the only channels on this model that are preset for narrowband. This means that if you have the four channel model (TK-2300V4P) then all channels are wideband.

    TK-2302 - Channels 13, 15, and 16.

    TK-3300 - Channels 3, 4, 5, 6, 7, 8, 10, 11, 15 and 16 are narrowband by default.

    TK-3302 - Channels 11, 12, 13, 14, 15, and 16.

    Protalk TK-3230 XLS
    Owners of the Kenwood ProTalk TK-3230 XLS have nothing to worry about, as this radio has been 100% narrowband by default for the entire existence of the product.

    TK-2400/TK-3400 Series Radios
    If you own one of the new Kenwood 400 series radios, you don't have to worry. These models are all preset to the same frequencies as the post August 1st "300 series" models above.

    TK-2200/TK-3200 Series Radios
    This is an older series that was replaced a couple of years ago with the TK-2300/TK-3300 series models above. For these models, refer to the list below for the channels that are preset to narrowband.

    TK-2200 - N/A (no channels are narrowband)

    TK-2202 - Channels 13, 15, and 16.

    TK-3200 - 1, 2, 3, 4, 5, 6, 7, 8 (all channels are narrowband)

    TK-3202 - Channels 11, 12, 13, 14, 15, and 16.

    What To Do Now
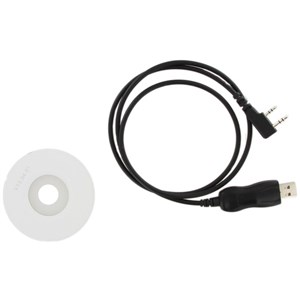
    All of this is great information but I know what you're thinking: What am I supposed to do now? The good news is that all of the models mentioned above fully support narrowband. The bad news is that it isn't a setting that Kenwood makes available through the radio itself. A radio dealer that has access to the programming software (like us!) has to change the setting.

    The best option is to send us your radios and allow us to change the bandwidth setting for you. If you bought the radios from us then you're in luck! We offer free programming for the life of the radio, so this will only cost you the amount of the shipping. (We've heard that some dealers are charging $50 per radio for programming!) If you like this option, just contact us and we will tell you how to get your radios to us.

    If you can't afford to be without your radios for a few days, another option is to just send us a single radio. All of the Kenwood models listed above support wireless cloning, so when you receive your narrowband compliant radio back from us you can simply wirelessly clone the settings to the rest of your fleet!

    If you've purchased a ProTalk radio after August 1st but also have older radios, you can simply clone your newer ProTalk radio to the older ones. No need to mail anything in for programming! Just follow our wireless cloning instructions or you can follow this handy insert that Kenwood has started shipping with newer radios.

    Yet another option is to just be sure that you only use a channel that is already narrowband compliant (listed above). This may seem like the easiest option, but there are a few drawbacks. First of all, your license may not include the frequency of the channel you are switching to. Before doing this you would certainly want to make sure that your license covers the new frequency, as switching from a wideband channel to an unlicensed one is just trading one potential problem for another. Also, leaving wideband channels on the radio would create the possibility that employees may start using these channels at some point in the future.

    Changing Your License
    Your frequency license also needs to be updated to add an "emissions designator" for 12.5 KHz narrowband. We can assist with this if you are not familiar with modifying your license through the FCC's ULS system. If you happen to be using the radios without a license, this would be a good opportunity to acquire a business radio license. A license is good for 10 years and provides you with exclusive use of your assigned frequencies.

    The new FCC narrowbanding requirements are a complicated topic that can't possibly be covered in a single article. We are here to help! As usual, do not hesitate to contact us if you have any questions!

  • Two Way Radio Basics

    In this article, we will be discussing some of the basic features and functions of two-way radios. Two way radios are tools for communicating, similar to telephones, and can come in handy for many situations. Whether it be for personal use, for your business or for emergency purposes, two-way radios are an excellent and reliable form of communication.

    Two-way radios (also called walkie talkies), allowing for a few exceptions, all work essentially the same way. There is a battery that powers the unit which is typically rechargeable. Volume can often be controlled with the use of a knob or button on the unit itself. When using the radio to communicate, the transmission is activated with the use of a Push-To-Talk or "PTT" button. Simply press the PTT button and speak into the microphone and your voice is sent over the air! When the PTT button is released, the receiver becomes active, allowing other radios to communicate back.

    A two-way radio, in its most basic description, is a "transceiver". This means that it is a device that can both transmit and receive content. Radios communicate with one another using certain frequencies. The radios can "speak" to each other only when they are set to the same frequency. The two most popular frequency ranges that two-way radios use are called "VHF - Very High Frequency" and "UHF - Ultra High Frequency". VHF frequencies are best for exclusive outdoor use, as these frequencies will hug the ground and travel further in open areas. UHF frequencies, the more popular of the two, tend to penetrate obstructions and will work well both indoors and out.

    Most two-way radios have the capability to work on multiple "channels". A specific frequency can be assigned to each channel, giving the radio many different alleyways of communication. Businesses often take advantage of channels by assigning a channel to each department. This keeps employees from being distracted by irrelevant conversations while still allowing management to easily communicate with all groups. On FRS consumer or family radios the channels are useful as a way to cut down on eavesdroppers or interference when in an area where there are many radios in use.

    The maximum range of a two-way radio will vary, depending on any number of things. In the unit itself, the range will be directly linked to the wattage of the unit and the antenna. The higher the wattage and better the antenna, the more range your two-way radio will be able to achieve. Outside factors can also affect range. Certain terrain, solid obstructions, or even day-to-day weather can be factors that will affect the maximum range your radio will transmit. Despite high range claims by manufacturers, we usually tell our customers not to expect more than 1-2 miles in an environment such as a city or town.

    Two-way radios can range from very basic to very complex pieces of equipment. This article is meant to introduce you to some of the basic features and how they operate, but we have barely begun to scratch the surface as to what two-way radios can actually achieve. Check our site or contact us for more in-depth information!

Items 131 to 140 of 174 total

CUSTOMER REVIEWS